

Most people with orchid plants at home will experience lovely flowers for many months, but eventually they will fall off, and the plant will start to look a bit tired. So how do you care for your orchid after blooming? Do you repot an orchid? If so, how do you repot an orchid, and if you do, when do you repot an orchid? Most commonly available orchids are epiphytes (for example Phalaenopsis and Dendrobium) - plants that grow on (usually) another plant (often in a tree), rather than in soil. So are there special orchid repotting instructions? This page will explain how to repot an orchid plant, what equipment you will need to care for orchids as houseplants over the longer term.
Sadly, many people do not realise that repotting orchids is important. After one or two seasons, their Phalaenopsis droops a little, leaves might look unhealthy and flowers might fail. With new orchids relatively cheaply available, the temptation might be to throw it out and buy a new one. But with a little care your orchid can thrive for years and years, getting bigger and bigger and producing more and more flowers. Orchid repotting really is very, very easy, and quite inexpensive. You just need to follow basic orchid repotting instructions: use the correct pot, and use the correct media.
Orchids can be repotted at any time - if you've had an accident and dropped it, for example. Some people like to repot a (mature) orchid as soon as they get it. If the plant is not in bloom, or has sat in a shop for some time, this might be a good idea. If it is in a clear pot already, you can generally gauge the state of the roots and media, and judge accordingly. In an opaque pot you do not have this luxury. But usually the best time to repot an orchid is after it has finished flowering. Beyond this, orchids to not need repotting every year; only when they have outgrown their pots or if their media has broken down, or perhaps if the plant is not looking too healthy and you are not under or over watering. The bark chips that constitute most medias gradually degrade into smaller pieces. If your plant's potting media looks more like compost than woodchip (it will probably be 'emptier' than it was too - actually just more compact), or has a musty smell it probably needs replacing. The fact is, orchids like air around their roots, and for the media to dry. As the fir bark media decays it compacts, reducing airflow, and increasing moisture levels. This can easily damage roots. If you have clear pots, you might also see tiny insects (springtails) living amongst the media. If there is any evidence of fungus or mould, you should definitely repot. Generally a healthy orchid needs repotting about every second or third year, depending on the media you use.
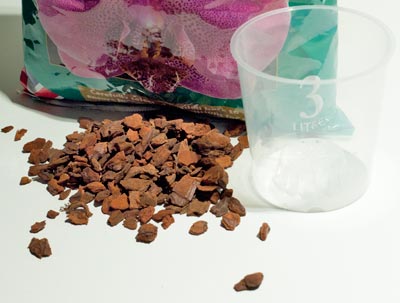
When it comes to repotting, orchid plants are pretty easy. For most orchids, a pot and some potting mix (generally bark chippings). That's it. No tools, and no chemicals. But you need the right media, and although any pot can work, a specialised orchid pot is certainly best. These are clear slotted pots - slotted to prevent a overly moist media (the biggest killer of orchids!), and allow air circulation; and clear to allow root examination (the best way to keep an eye on your orchids general health). Orchids like to be fairly snug in their pots, not too much space around the roots, but neither should there be no space at all. If there is insufficient media the pot will dry out quickly, making it difficult for the plant to keep hydrated in hot weather. In general you should repot orchids in a pot just one size bigger than the pot it came from. If your orchid has not done well, and grown much, you may be able to simply reuse it's existing pot.
You can make your own orchid potting mix, but frankly it is so cheap and widely available, most people just buy it. There are medias by a lot of well known brands, and all are pretty good. buy online. You can add a little charcoal to keep the media fresh, but this is certainly not essential.
I did say no tools - if your orchid is in bad shape, you might have dead or dying roots. A pair of sharp scissors is useful to remove these, but these will not be necessary for a healthy plant.
The actual process of repotting is very simple. Just remove the old pot, gently clear away any old bark chippings, and replace with new media. That's the essence of it, although there are a few additional things to consider.
Many orchids that are not doing well will have root problems. Keeping them too moist with insufficient aeration is a recipe for roots to rot. Then they can not transport water to the plant. In turn leaves look dehydrated so owners water more! This is an excellent reason to keep your orchid in a clear slotted pot! When repotting cut away any rotted roots, leaving only the stiffer, healthier ones.
Orchid roots are specialised - some grow into the substrate, others (aerial roots) do not. Do not plant aerial roots! When repotting your orchid, only put the roots that were previously covered with bark into the pot. Let the aerial roots be!
The Phalaenopsis below is a bit battered, with leaf damage from an accidental drop, but other than that is in pretty good shape. There are plenty of aerial roots, but also masses of normal roots crammed into a pot with almost no media. But it is in otherwise fairly good shape.
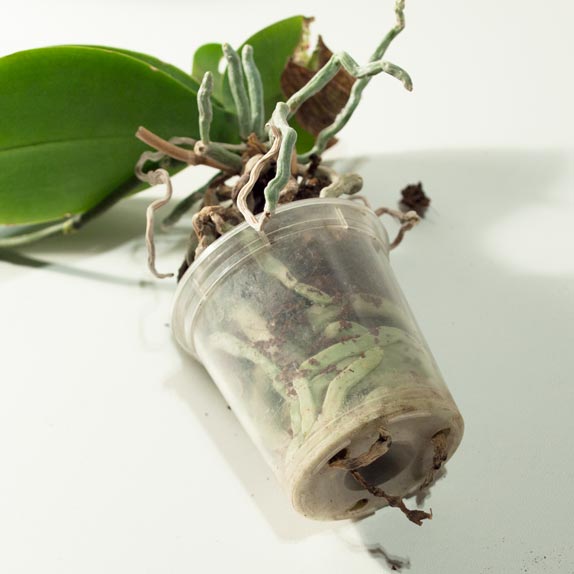
As can be seen the bottom half of the pot is crammed full of roots, with almost no media. This will not harm the plant, but will reduce it's resilience to infrequent watering. The media that is left hasn't really broken down significantly - it appears to be coir, rather than bark, but it is time to repot this orchid. This one is in a 6cm (diameter) pot, so we'll move it up to the next size (9cm).It should not be difficult to remove the old pot, though you might need to give it a gentle squeeze to loosen it up a little.
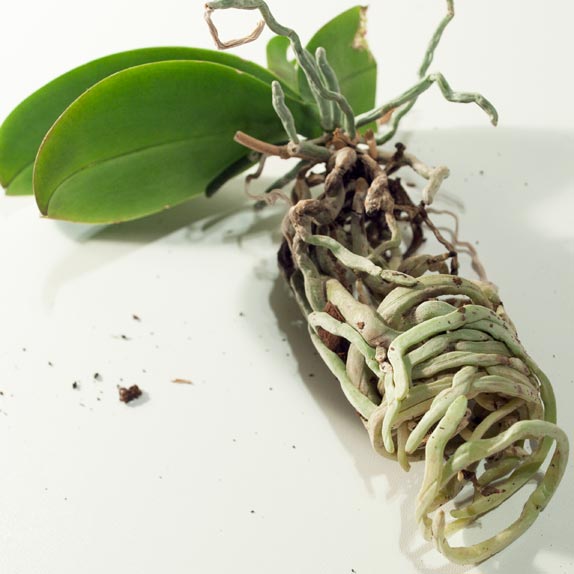
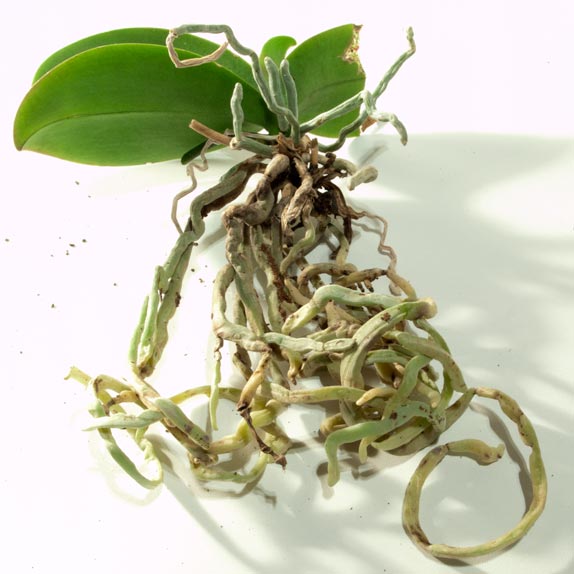
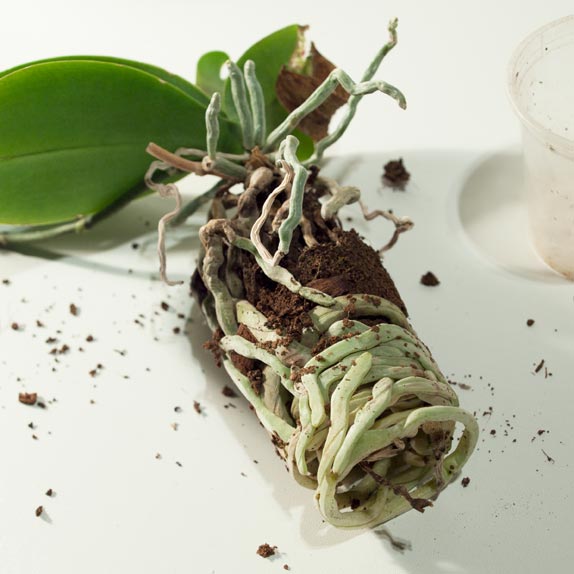
Once the pot is removed, the roots can be gently untangled, teasing out remnants of the old media. Pretty easy really, and the healthy roots are generally tougher than they look. There are a lot of roots here! As can be seen they are quite healthy and this orchid will thrive in its new pot.
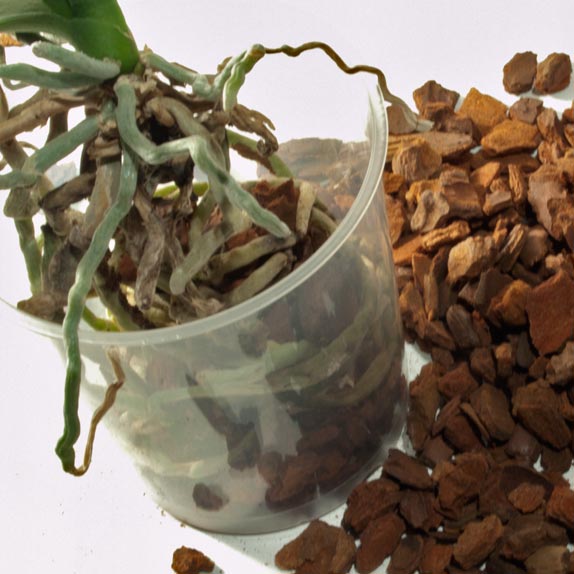
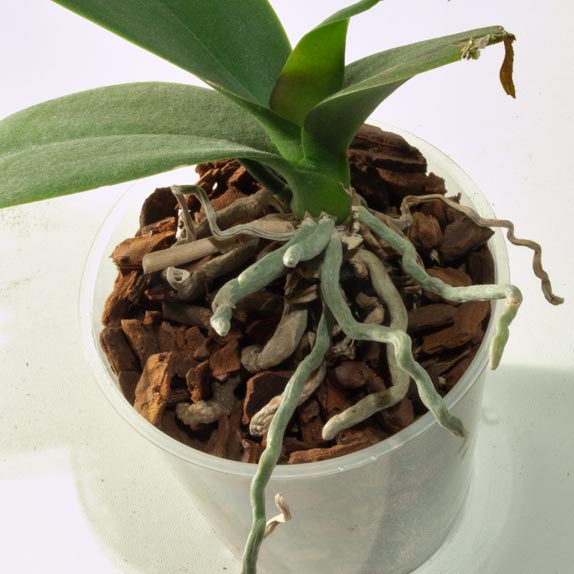
The actual process of repotting is really easy. Just put the plant in the new pot and start to fill with new dry media. Don't push the bark chippings in too firmly. Just enough to hold the roots in place. Push the bark down, particularly around the outer edge of the pot. There will be plenty of small air gaps in the media, and you can gently massage, shake or tap the pot as you fill, but don't worry too much about getting it all packed down. Remember orchids like a bit of airflow around their roots. Make sure you leave the aerial roots above the new media - these should not be buried. Once repotted, you should be able to lift the orchid (gently, don't swing it about!), just below it's leaves, and find the new pot stays on the plant. If it immediately comes unpotted, you probably needed to push the media down a little more firmly. If you've cut back a lot of roots this might not be possible, but should be fairly easy to achieve with a plant with strong healthy roots.
And that's about it - you now know how to repot an orchid - at least a healthy one. Let's have a look at an orchid in not so good shape.
Below is another Phalaenopsis, but one in really bad shape. Even with a repot, it is unlikely that it will pull through, but let's have a go anyway. So what went wrong? This is all too typical. Epiphytic orchids really don't like to sit in water. It will rot their roots, disrupting their ability to get moisture to their leaves, which will in turn droop, prompting the owner to add more water! It's a negative feedback loop that probably kills more orchids in peoples homes than anything else.
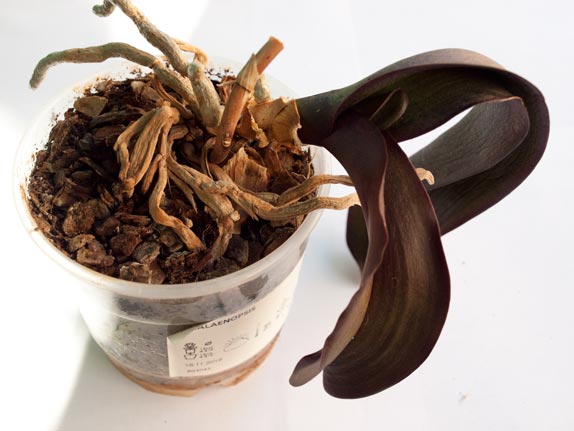
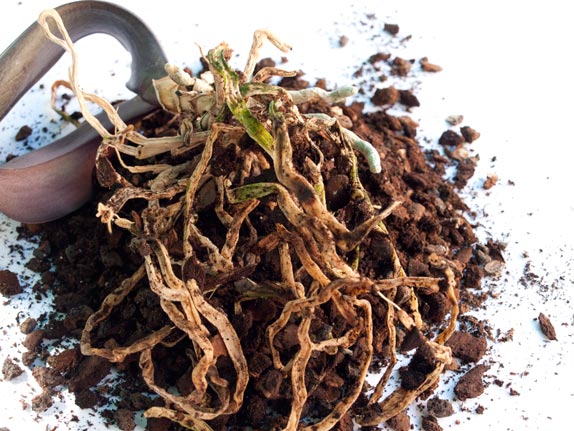
Although the aerial roots look ok, the leaves certainly do not. But look at the roots once the pot is removed. Practically all are dead: they are brown and stringy, with no strength to them. Compare them to the healthier roots of the first Phalaenopsis we repotted, further up the page. Of course these will need removing. Generally, when repotting orchids, aerial roots will not need removing.
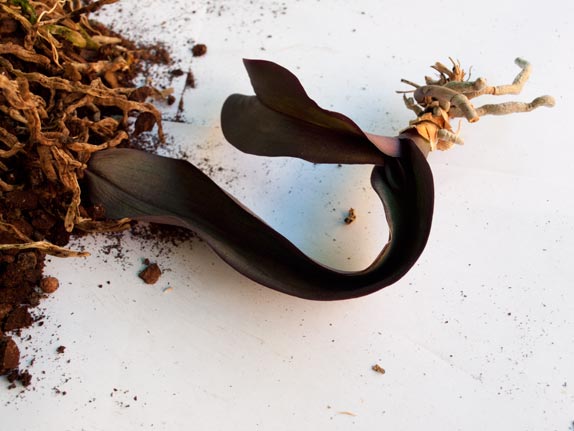
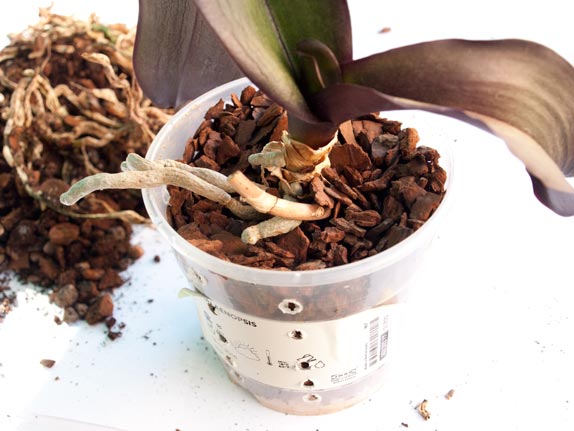
After cutting back all the dead roots, there really is not much left. But we've repotted anyway, in the same pot. But note we've added extra ventilation holes on the sides. This plant will struggle to absorb moisture through it's limited roots, and will probably benefit from regular misting rather than actual watering.
If you are repotting an unhealthy plant, probably best not to repot another healthy orchid straight afterwards. Just like any organism, bacteria and viruses can spread through contact. Pathogens can easily transfer on pots, tools (e.g. when cutting old roots), or even remain on surfaces (including you!). Clean things down (with detergents) and repot on a disposable surface such as old newspaper.
Once (or before) you repot an orchid, remove the (now finished) flower spike. Sometimes an orchid will re-flower from the same spike, but after repotting you really want the plant to put its energy into root growth, rather than flowering. Flowers will return, but make sure the plant is established in its new pot first.
I always write a date with a sharpie on my orchids pots. Usually where, and when, I got the plant, but also when it was repotted. This is not really to tell me when to repot (looking at the orchid / media health is a better guide for that), but I find the information useful anyway, and can help you plan ahead. If you have a lot or orchids out of bloom, it can also help you recognise similar looking plants.
After you repot an orchid plant, give it a water by all means, but then water less for a while. The plant will have finished flowering and will enter its dormant phase for a couple months, so will not need the level of water and feed that it might have had previously.
Some orchids can be split during repotting, to create new plants. Species with pseudobulbs (e.eg. Cambria) can be simply pulled apart at the base of the plant, and potted in separate pots. Others (like Dendrobium) may have grown new stems, that likewise can be separated.
Clear slotted pots really help in keeping orchids healthy, allowing excellent drainage, aeration, and root examination. Strongly recommended! (Slotted is always good, but some orchids, e.g. Cambria prefer an opaque pot.)

$55


$30

$35

$30
more orchids for sale


